Wednesday, December 15, 2010

Christmas Craft Challenge 2010 - Day 14

December 14th 2010


Christmas Cards


Today we see the revisit of the little beaded decorations I made a couple of days ago as they remake their appearance, this time as removable decorations on my Christmas Cards.

  1. Fold pale blue card base.
  2. Cut patterned paper to size.
  3. Run ribbon strips through Xyron 150 machine. (I ran them through in lengths to make four cards at once then trimmed to length as I adhered the ribbon).
  4. Lay thin ribbon across patterned paper then stick large ribbon strips from step 3, over the top to adhere in place.
  5. Adhere patterned paper to card base.
  6. Cut card strips long enough for your sentiment. Cut all fours corners with a corner rounder.
  7. Add rub-on sentiment centering across card strip.
  8. Adhere sentiment strip with double sided foam adhesive to give additional depth to your design.
  9. Attach beaded mini ornament using the thin ribbon attached in step 4.
  10. Fill in your card & post or deliver to recipient.
I managed a production line with these cards. Cut everything out, ran the ribbons through the Xyron etc in bulk then assembled all the cards through each step though still managed to ensure each card is different through the use of different coloured thin ribbon, sentiments & of course the beaded mini ornaments.

Tuesday, December 14, 2010

Christmas Craft Challenge 2010 - Day 13

December 13th 2010

Chocolate Marshmallow Truffles

One of the foods synonymous with Christmas for me is truffles. Those bite sized mouthfuls of chocolate usually coated in coconut or cocoa and often laced with a hint of liqueur of some description.
As nice as they might be, I've never actually made them (that I can remember) until now. And that is all thanks to my son Kurt, who made them in his Home Economics (or whatever it is called now) class at Rosehill High School a couple of weeks ago. He made some at home a few days after the class, and let me say they were rather more-ish, so I decided to try them for myself. I was also thinking nothing beats home baking as a Christmas gift.
I will be creating some 6x6 pages for my recipe book of this recipe and my other Christmas favourite - Ambrosia - and I will post these once they are done. 
I re-purposed a Ferrero Rocher chocolate box. Added a cardstock strip, some white & silver ribbon then decorated with aqua, navy & silver stars in two sizes. These colours matched the pale blue mini cupcake cases I put each truffle into within the box.

Monday, December 13, 2010

Christmas Craft Challenge 2010 - Day 12

December 12th 2010


Paper Bauble Ornaments


Firstly an apology for this post being late. Yesterday was a gloriously sun shiny day and I got caught up in a water fight between my kids, then spent the rest of the afternoon baby sitting my granddaughter who wanted Nana - Sonia time and I just couldn't refuse.


This meant today's craft was a bit quick and easy, but we all need days like that sometimes.

  1. Trim 12 strips of paper to measure 2cm x 14cm and make a hole approximately 0.5cm from the end  on both sides of each piece. (After making this I would suggest using only 10 strips or making the strips a little narrower. As the picture shows the gaps are not that big when you follow the instructions.)
  2. Holding both ends together, poke a brad through a 10cm length of ribbon.
  3. Take one end of the first paper strip and thread it onto a brad. Repeat this until all the strips are in place, then open out the brad to secure in place.
  4. Do the same thing with the holes at the other end of the paper strips, then carefully separate the strips of card until they form a ball shape. (This step was easier said than done and required a little effort to separate them without buckling the paper, but once separated from the bundle of strips, rearranging them was an easy task.)
  5. Highlight your patterned paper with Kindi-Glitz for some extra Christmas "bling".


  1. Trim 15 strips of paper each measuring 1.5cm x 10cm and make a hole in the centre of one of the strips. I used my Crop-O-Dile punch.
  2. Take a 10cm long piece of ribbon and thread the two ends through the hole before securing them in place with double sided tape.
  3. Carefully bend each of the strips and tape them together with double sided tape at the end only to form 15 tear-drop like loops.
  4. Stick each of the tear drop loops together with double sided tape to form the decoration. I placed a short length of double sided tape at the widest part of the loops only to join them together.
  5. Decorate with Kindi-Glitz if desired.

Sunday, December 12, 2010

Christmas Craft Challenge 2010 - Day 11

December 11th 2010


Altered Candle


This is a very simple and very cheap craft that anyone can do. I bough the candle at a $2 shop, also the bling stars which I have had in my stash forever. The cardstock & patterned paper was from my scrap box.

  1. Measure the circumference of the candle and cut cardstock with a slight overlap.
  2. Repeat with patterned paper - I cut a slightly bit longer to allow for the extra thickness then trimmed the overhang once I had curved the cardstock & patterned paper to fit.
  3. Along each long side of the cardstock adhere a strip of double sided tape.
  4. Peel off one strip then sprinkle with glitter. Repeat for the other side.
  5. Adhere the patterned paper, centering between the glitter strips.
  6. Wrap the cardstock around the candle adhering only along the side seam. (The cardstock should be able to slip up & down the candle if pushed, but not so loose that it slides off.)
  7. Add the bling/glitter stars to finish.

Saturday, December 11, 2010

Christmas Craft Challenge 2010 - Day 10

December 10th 2010


Sequin Baubles


As any scrapbooker or crafter would probably attest, you can never have enough "bling" at Christmas. Today I blinged out some polystyrene balls with lots of sequins & beads.
Basic Instructions:

  1. Paint polystyrene ball with 2 coats of silver paint. This is optional but I thought it would look better than seeing plain white in any gaps.
  2. Wrapped ribbon around diameter of ball then again at a perpendicular angle. Create a loop of ribbon at the top, long enough to slip over the branch of a Christmas Tree. (Except for multi-coloured bauble which only has a loop for a tie)
  3. Artistically cover the ball in sequins and beads held in place with either glue or bead pins. Birch Haberdashery & craft now produce a special short "Sequin & Bead Pin".These are the normal diameter of a pin but are only 13mm in length. They are available in Steel Nickel & Copper? plated. I found them in Spotlight with all the pins & needles. They are perfect as they don't go too far into the polystyrene ball, unlike normal pins.
  4. Hang on your tree to decorate.

Blue - Ribbon to divide into quarters. All quarters are filled with light blue stars and highlighted in the middle of each quarter with dark blue flowers. All sequins held with beads on top. The stars are sequins I inherited from my late Grandmother, so must be at least 30 - 40 years old if not older. I really enjoyed being able to use something that will forever remind me of my heritage.
Purple - Opposite quarters with dark purple stars as above and the other 2 with transparent mauve round cup sequins. All held in place with clear beads.
Mulit-Coloured - Multi-coloured 10mm cup sequins, held in place by only a pin, no bead.
Black/Silver - Opposite quarters with a flat cut 10mm black faceted sequins. Other quarters have flat cut 10mm flat silver sequins. The outer ring are held in place with a bead on the pin. The inner sequins have a bead both above and below the sequin for added dimension.


These were really easy to make though someone time consuming. I would highly recommend them as an activity for older children to make, though patience and the sharp pins may be an issue.

Friday, December 10, 2010

Christmas Craft Challenge 2010 - Day 9

December 9th 2011


Beaded Mini Ornaments


These are going to be part of something else, but they were too cute not to have their own blog. They are all made of seed beads and 26 gauge wire. A couple also have 6mm beads and they are all simply held together with 1mm crimps.
The Christmas Tree is 1 3/4" x 1" while the Stars are 3" x 2" including their trail.

  1. Cut wire to length.
  2. Form base shape with wire.
  3. Thread on the seed beads.
  4. Fix design in place with silver crimp.
  5. Add additional highlight beads (on trees & holly only)
  6. Coil wire ends and pull out to form trail on stars only.

Thursday, December 9, 2010

Christmas Craft Challenge 2010 - Day 8

December 8th 2010


Beaded Snowflakes


What can I say these are just beautiful and really easy to make.

  1. Cut 20 gauge wire to length, (6 lengths per snowflake). For red & blue centres this was 3", for the pink centre this was 4".
  2. Using round nosed pliers create a loop on one end of each length to prevent the beads falling off.
  3. Thread onto wire the selected beads and secure in place with a second loop so that they do not fall off either end.
  4. Add a dab of hot glue onto the edge of the large gemstone and place one end loop into the glue. Hold in place until firmly attached.
  5. Repeat for all beaded lengths, taking care to spread them evenly around the jewel.
  6. Stick second gemstone on to the back to cover the loops and glue.
  7. Attach a loop of ribbon or fibre to hang the decoration from your tree or window.

Tuesday, December 7, 2010

Christmas Craft Challenge 2010 - Day 7

December 7th 2010


Gift Card Folder


My parents live in Christchurch whilst I live in Auckland so getting gifts to them can at times be a bit awkward. As they are both quite the Wine Connisseur, the past few years I have bought them a voucher for a bottle shop so that they can go and purchase some nice bottles of wine to enjoy. I do this as unfortunately wine bottles have a tendency not to travel all that well, so this method allows me to give them something that they will enjoy without the risk of breakage - no offence intended to the wonderful NZ Post staff.
Long gone are the days of paper gift vouchers, they all seem to now look like credit cards, which can easily get lost in the envelope unless securely adhered inside a card or something. To make it all look a little nicer I have gift wrapped the gift card to slip in with their Christmas card.

  1. Cut cardstock to 22cm x 12cm and score at 6cm & 14.5cm from one end.
  2. Round the two top corners (the 6cm bit) using a corner-rounder punch.
  3. Cut a rectangle of patterned paper 21cm x 11cm, round the top two corners. NB: If your patterned paper has words on it check which direction they will lie before cutting the top corners. You want the wording on the front of the card to be the right way around, not upside down.
  4. Fix the patterned paper to the cardstock with double sided tape. Take care to fold on the score lines marked onto cardstock base.
  5. Cut two lines in the back portion of the gift wallet for diagonally opposite corners of the gift card. This will stop the gift card sliding out of the wallet during transporting (or gift giving).
  6. Insert the gift card into the slits.
  7. Cut a 20cm x 2.5cm strip of card stock. (Mine is slightly wider to accommodate the width of the Maya Road Velvet Blossom Trim).
  8. Decorate with patterned paper or ribbon.
  9. Layer the strip around the wallet to form a band to hold the wallet closed. Secure the ends with double sided tape.
  10. Add an embellishment to the band to decorate. I added a decorated stick pin which coordinated with the burgundy of the cardstock & velvet trim.


Christmas Craft Challenge 2010 - Day 6

December 6th 2010


Lunch Bag Gift Wrapping


There probably isn't a scrapbooker who doesn't have a few lunch bags sitting in their stash which are leftover from the last paper bag album they created.
They make for a quick & easy gift wrapping regardless of the reason for the gift giving.

  1. Measure lunch bag.
  2. Cut cardstock & patterned paper to fit.
  3. Add embellishments, title, journalling etc.
  4. Attach to the lunch bag.
  5. Insert present, seal & label
Note:
Boys - cardstock 10" x 7"
Girls - cardstock 7" x 7"
Height was purely related to the height of the gift to go inside the respective bags.

Monday, December 6, 2010

Christmas Craft Challenge 2010 - Day 5

December 5th 2011


Gift Mini Album
There are two versions here each made with one of the Top Line Creations/Breezy Designs old QuikSAND kits. I do have some left in stock (at special prices) so if you are interested in seeing more including what themes I have let me know - shameless plug for my own business). See more later.
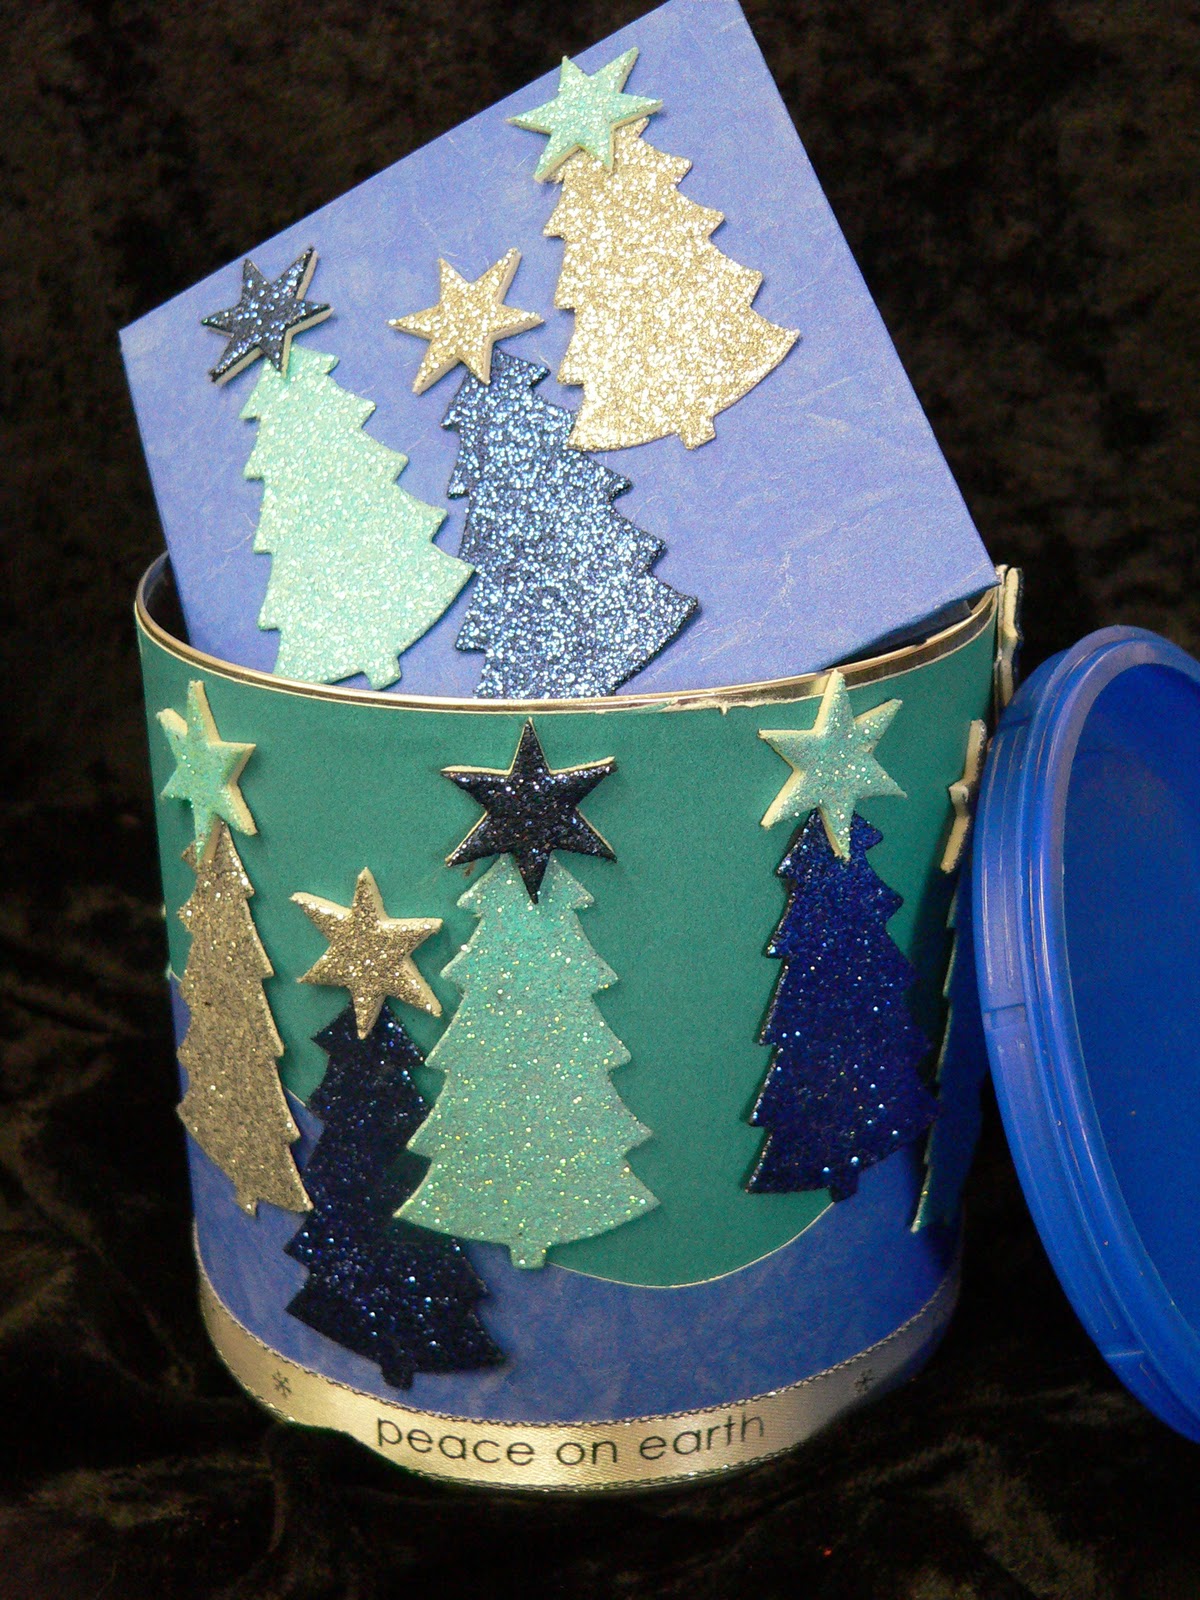
I used two different Christmas themed kits. "Jingle Baby" has a modern red & green colour scheme with fresh white accents, while "'tis the Season" has a more Vintage/Heritage red & green colour scheme. Each kit includes 2 sheets of cardstock, 3 patterned paper & a sheet of cardboard die cuts.The only things I added other than basics like adhesives, was a large pre-cut tag, ribbons, embroidery thread and a few embellishments. Everything else was included in the kits themselves.
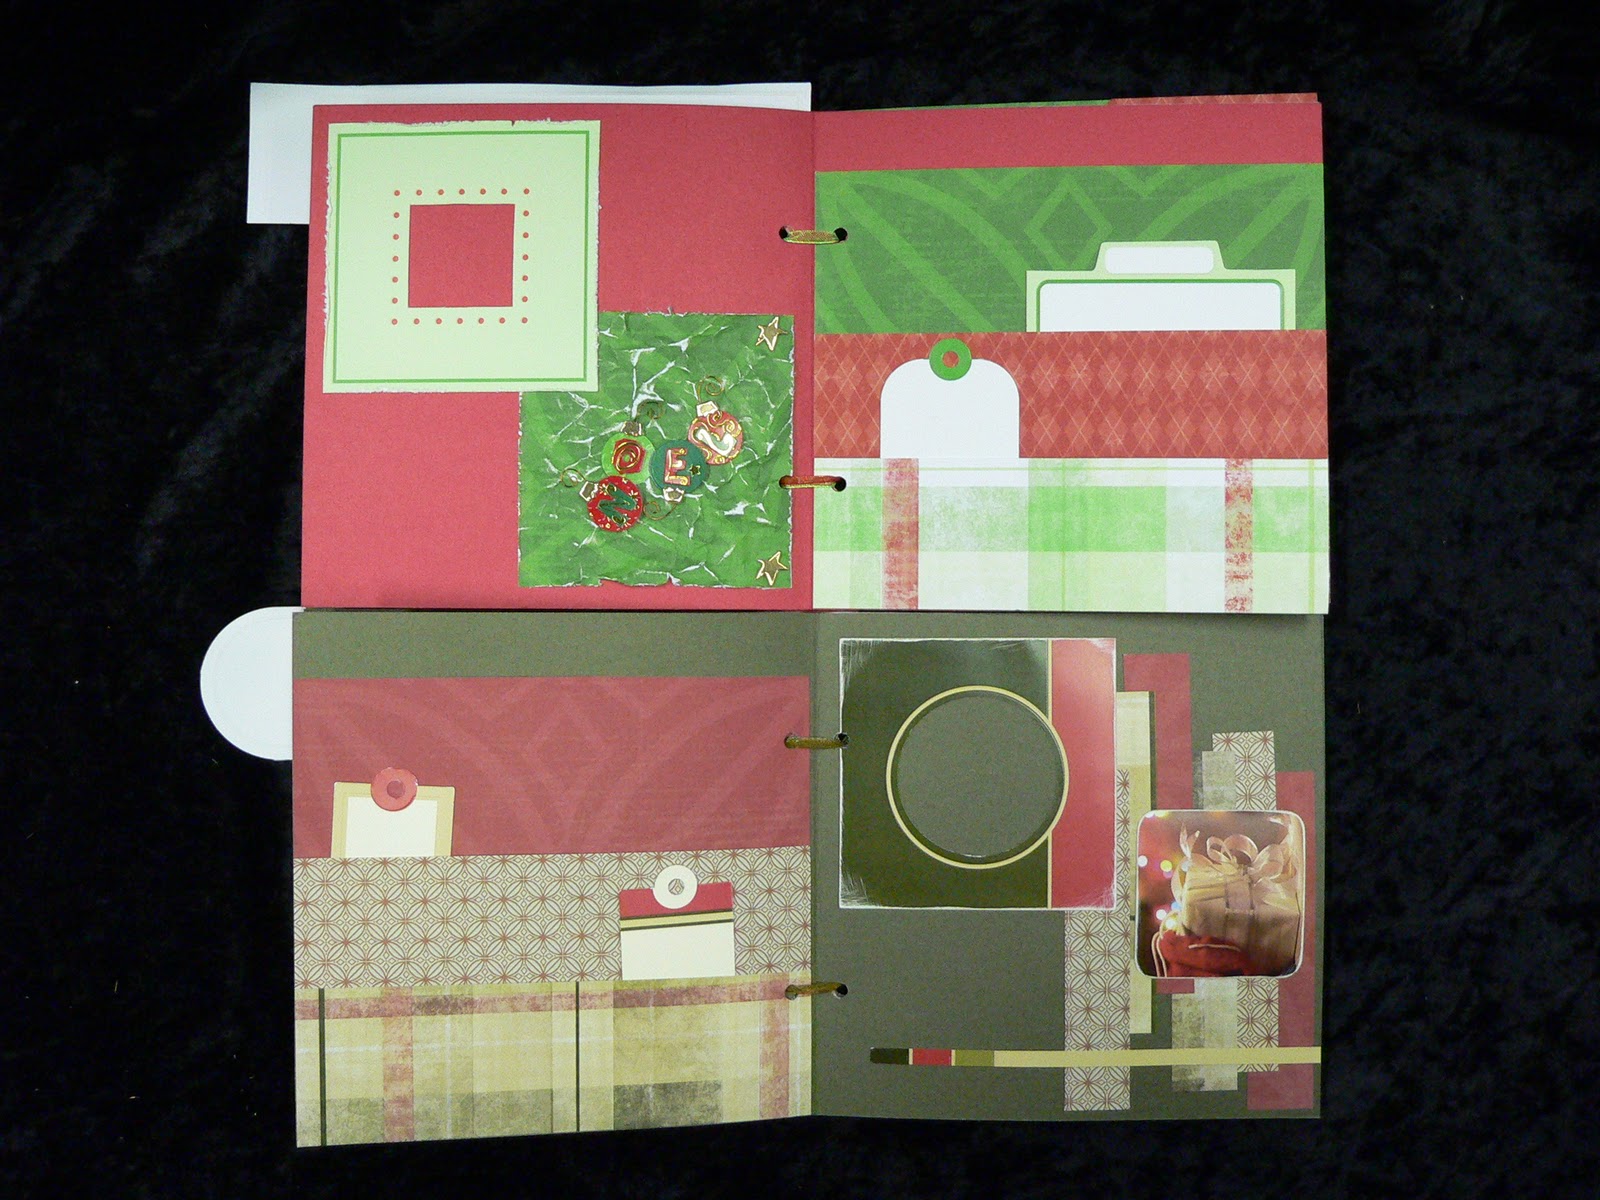
Pages 2 & 3 of each Mini Album. I used the same page layouts for each album though just rearranged them throughout the albums. For these to pages you can see the same layout was used. The top of all frames were left open so that photos could easily be slipped into the album without it having to be taken apart. There are also several pockets throughout album, such as the one with the tags slipped in, to enable memorabilia to be added without the need for a great deal of additional work.
Pages 4 & 5 - Top album includes some matting for photos to be added to. Other pages don't always have a photo mat included to add variety to the pages & design of the album. Ribbons & embroidery threads for added dimension.
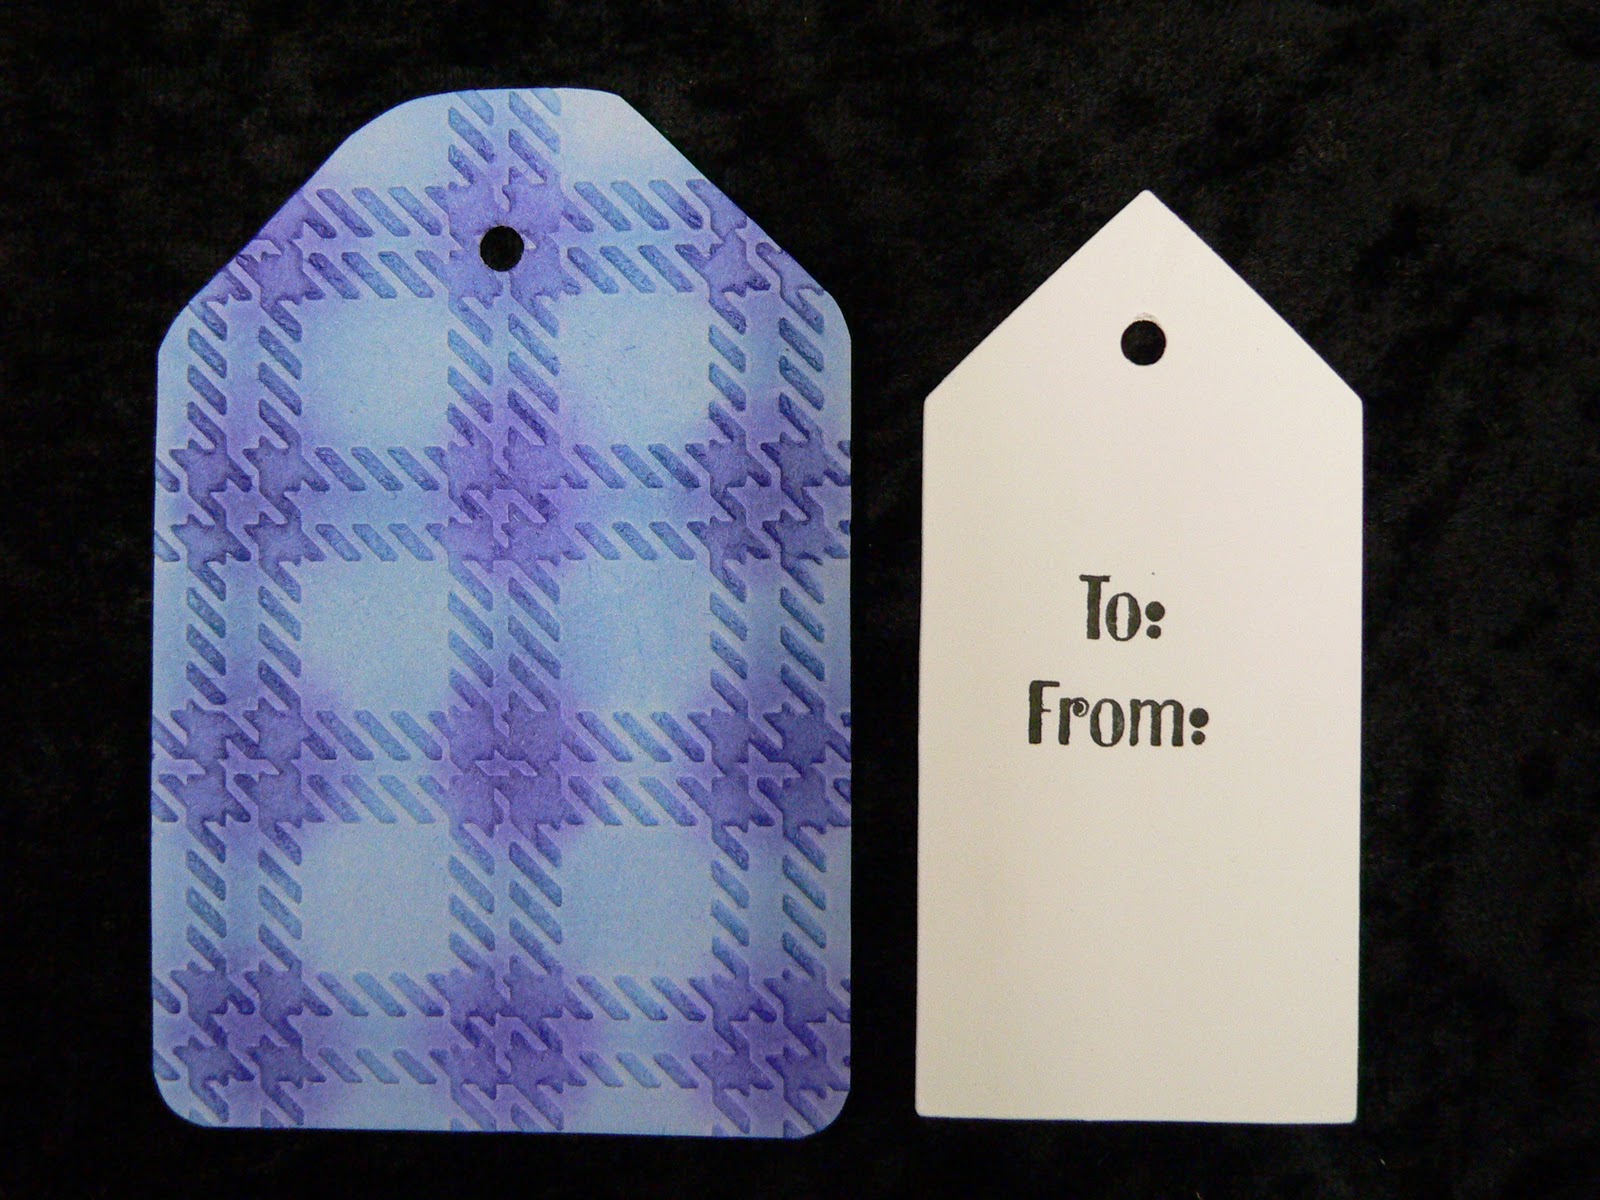
Pages 6 & 7 - More pockets to slip things into. Some tags have already been included as an example to show the use of the pockets. Different techniques used on pages such as distressing, crumpling, layering, inking for added interest.
Pages 8 & 9 - Same page design, different orientation, different techniques & no matting for photos so can add as many or a few as you like. Also plenty of space to add journaling.
Pages 10 & 11 - The album pages were 6" x 12" cardstock folded in half - 3 double pages bound together. The additional piece of 6" x 12" cardstock was used for photo matting (as seen here), pockets & to create the binding for the spine.
These make lovely gifts for anyone who likes the look of something hand-crafted but who may not have the time or the inclination to actually make them themselves. The designs are purely samples and you can modify these or change them to suit your own needs. You can also complete the album as you go, inserting the photos & memorabilia as you create the album so that it is complete, rather then ready to just add photos. This album has 12 pages including the front & back covers, though you could easily add additional pages just by adding more cardstock. You could also use up scraps of paper rather than brand new sheets of patterned paper.


Saturday, December 4, 2010

Christmas Craft Challenge 2010 - Day 4

December 4th 2011


Today's is a quickie stocking filler - some very cute decorated notebooks. I have made some in traditional red & green Christmas colours, but also some in non traditional (but very girlie) purple & green and purple, black & white.
I used cheap notebooks I bought on sale at the Warehouse (97c each - don't ask me where they got the pricing from), scraps of patterned paper, rubon leftovers, odd flowers, bling, embellishments & ribbons. Each notebook took 5 - 10 minutes to decorate & then I sold them for $5 each at my craft stall.

  1. Decorate front cover of notebook.
  2. Add sentiment if desired.
  3. Tie coordinated ribbons to spine of notebook.
These days I always carry a mini notebook in my purse for messages, reminders & all those brilliant money making schemes I think up while out & about & shopping lists especially at the moment.
You can make them all Christmasy or decorate to suit the intended recipient of the notebook.


Friday, December 3, 2010

Christmas Craft Challenge 2010 - Day 3

December 3rd 2011


Christmas Present Tags are essential when you are giving presents to more than one person. Many an embarrassing moment has occurred when one has been neglected from a present... who is it from and who is it to??? (My own family has been guilty of this Christmas faux pas so I speak from experience.)
In the past I have generally resorted to a roll of self-adhesive, fill in the details then slap them on the present tags but this year I have made my own. 
I perhaps didn't think about my design enough, as happens when I shoot from the hips but I still think they look cool and hey this way I can turn them into a mini album afterwards.


  1. Cut tags out of scrap cardstock using my Fiskars shape cutter & template.
  2. Dry embossed tags using Provocraft Cuttlebug Embossing Folder
  3. Decorated and highlighted the various embossed designs using chalks, H2O paints and Kindi Glitz. Set chalks with hairspray.
  4. Punched hole in top of tags with my Crop-A-Dile.
  5. Die-cut small tags using Sizzix machine (tried writing onto the back of the embossed tags and it didn't look good so decided to add small tag to write To:/From: message).
  6. Stamped To:/From: onto each tag.
Will write each tag as I wrap presents and tie a decorative tag to a To:/From: tag with coordinated cord then attached to the parcel.
I may need to make some more tags depending upon whether I wrap up presents individually or altogether. I like individually, as it makes me feel like I'm getting more and who doesn't like feeling spoilt at Christmas time.

Thursday, December 2, 2010

Christmas Craft Challenge 2010 - Day 2

December 2nd 2011


Today's challenge item is a Memory Tin with Mini Accordion Album that fits inside.


The tin is a pre-loved Jarra 99% fat free Hot Chocolate tin... my poison of choice so I have a few.


Memory Tin:

  1. Covered the tin top to bottom with patterned paper. Had to do a patch job as the tin is about 12 3/4" in diameter, but strategic placement of embellishments can hide a multitude of sins.
  2. Added my hills - hand cut coordinated patterned paper (just hand cut random rolling hills then matched them up at the seam.
  3. Add ribbon strip which I had run through Xyron (only way to go).
  4. Embellished tin with glitter trees and 3D foam back stars.
Accordion album:
  1. Cut front & back cover from cardboard (heavy card or book board).
  2. Cover outside of album covers with patterned paper, mitre corners and fold edges over to the back side of the covers.
  3. Cut strips of coordinated cardstock & fold into accordion album. I cut three strips then taped them altogether to create one long strip.
  4. Attach ends of cardstock strips to the front & back cover.
  5. Decorate pages with coordinating papers & embellishments.
  6. Decorate the front cover of your album to match the embellishments used on the tin.
  7. Insert the album & any other small gifts into the tin.
This is a wonderful present and perfect for using up both your scraps of paper as well as re-purposing what might otherwise be something to be just thrown away.

Wednesday, December 1, 2010

Christmas Craft Challenge 2010 - Day 1

December 1st 2011


Todays Christmas Craft item is the Artist Trading Cards (ATCs) I made for a swap through Crafting Passionz.


  1. I spritzed the cardstock base which Paper Glide then dry embossed using a ProvoCraft Cuttlebug Embossing Folder through my Sizzix machine.
  2. Gently rubbed some white chalk over each of the snowflakes to give a "halo" effect then set the chalk with hairspray.
  3. Highlighted the chalked snowflakes with Crystaline Kindi Glitz and allowed to dry.
  4. Highlighted some of the fine scrolls with Gold H2O paints using a Zig Waterbrush.
  5. Printed out the Victorian Santa Sign Holder Image from The Graphics Fairy.
  6. Highlighted Santa's suit with Red & White H2O paints.
  7. Hand wrote my Santa Wish List. 
  8. Ran the Santa image through my Xyron 510 then stuck to the background.


Friday, November 19, 2010

SCF Design Team - Challenge Entry

I sent in my first challenge entry for the Scrapbooking & Crafting Friends Design Team. 


Here are a couple of cards that I made using the Tainted Sweets Balloon Bears digi-stamp from MyGrafico.


This card is for Ajay on his first birthday this weekend. He is my granddaughter's cousin. 
This card was for the ever lovely Miss Vienna who so kindly allowed our family to share her birthday party as we celebrated my step-children's Grandfather's birthday at the Auckland Botanical Gardens.

Christmas Craft Challenge 2010

It's that time of the year again... 


The stockings get hung by the chimney with care, 
The presents are wrapped & hidden 'neath the chair.


The Christmas cards get made, then written & posted,
The work Christmas parties are organised & then hosted.


The menu for Christmas Day gets sorted & split,
Between family members so the day is a hit.


And just when you thought you were Queen Organise,
Here comes Paula with her Christmas Surprise.


From December the 1st through 'til Christmas Eve,
She is issuing the challenge to those who believe.


Any Christmas Craft that you care to share,
Just add a link for your blog, as often as you care.


I will be posting to my blog every day,
My Christmas creations, so come look, have your say.


The second year of Christmas crafts will be better than the last,
So come one & come all, Christmas will be over too fast.


Now that I have my little poem out of my system, I hope you got the gist of all of that. Starting on the 1st of December I will be posting on my blog every day my daily Christmas Craft creation.
I would love for anyone & everyone to add a link to their blog or gallery of any of their Christmas creations. You don't have to participate every day as I understand this is a big commitment. If you create daily, every two days, once a week or even just once during the lead up to Christmas, add a link to your blog in my comments so we can all check out your Christmas creativity.
If you want to add a link to my blog in yours about my Christmas Craft Challenge, that would be fantastic as well.


And finally to see my creations from last year just follow through some of my archived blogs from December 2009 or click here. Then look through my creations during the 2009 Christmas Craft Challenge.


Please leave a message or comment to let me know you are following or joining in this year's challenge and I will try to add a link into my postings of where people can follow you as well.


Merry Christmas and Happy Creating.

Monday, November 15, 2010

For Steve's 73rd Birthday

Steve (aka Stewart) is my step-children's maternal grandfather. Today he celebrated his 73rd birthday. For us as a family, this is an achievement as he was recently diagnosed with brain tumour.
I wanted to give him something special he could put on his wall at the rest home hospital where he now resides. Each of the photos carries a story that although I haven't journaled for him on this page, I will add to the page probably as hidden journaling.
(Sorry - it's not one of the clearest pictures)
Close-up of one of the corner embellishments. These are rub-ons from Scrapbook King which I have highlighted with both a brown & white pen, to make the designs stand out more from the cardstock background.

Monday, November 1, 2010

Announcement...

I was hoping to hold-off until I had done completed my first assignment... but I'm just too impatient to share with everyone.


I have been accepted onto my first DESIGN TEAM... YAY!!!


It is with great pleasure that I announce my acceptance as a member of the Scrapbooking & Crafting Friends Design Team


Watch this space as I publish on my blog and the SCF Design Team Blog some of my creations. I can't wait to use some of the Digital Creations for our wonderful sponsor at My Grafico. Be sure to check out the exciting range they have available.


Back to creating my first challenge...

Friday, October 22, 2010

Tim Holtz Blog Candy Giveaway from "Scrap With Stacy"

I've been scrolling through some blogs lately looking for projects and pages and ideas and competitions and along the way I discovered a blog with all of the above and more. 

Here's the link to this amazing blog candy:


Stacy wants to thank all her followers and has put this great giveaway together. If you are a fan of Tim Holtz (and who isn't) be sure to check out this opportunity to win this wonderful blog candy.
Ohhhhh Pick Me!!!!

Tuesday, October 12, 2010

Mel's 18th Birthday Present

Last weekend was my niece, Melissa aka Mel's 18th birthday.


Though finances are tight, I knew she would have something completely unique as I made both her card and her present.