Monday, January 31, 2011

Technique Class - Foam Alphabets

Not sure about anyone else's opinion but I like shopping at $2 shops for bargains, especially scrapbooking finds. One of my best finds to date has been packs of foam alphabets in various colours. You get two sheets, with multiples of every letter. They are self adhesive, a good size and the colours are pretty versatile, especially the white ones.
I have used them straight, as they are, fresh from the pack, but I really love the look you get when you ink them and then coat them in Dimensional Magic or Glossy Accents.
It's easy to do though does require some patience waiting for the Dimensional Magic/Glossy Accents to dry so that you don't end up with sticky finger marks embedded in the Dimensional Magic/Glossy Accents.
  1. Select the required letters, I usually cut them out but leave them on the backing paper.
  2. Ink the foam letters with your choice of ink. I have used VersaColor Ink Pads and VersaMagic, both with success.
  3. Allow the ink to dry a little before wiping the excess off with a paper towel or tissue. Excessive ink doesn't seem to want to dry onto the foam letters and heating them with a heat gun would probably melt the letters.
  4. Apply Dimensional Magic/Glossy Accents. I outline the letter then fill in the middle for a good coverage. Take care not to leave any air bubbles as these will mark the final result. Allow to dry at least a couple of hours depending upon the temperature and humidity.


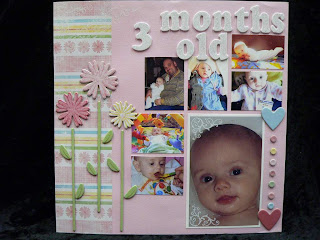
Then apply your letters to your project. You will see these letters on the finished project near the end of February.
Thursday, January 27, 2011

Missing Post - OTP

Sorry I didn't get a chance to finish my blogs for last night or tonight but I do have a really good reason.


I was playing with my granddaughter - Sonia-Marie.


We played at eating pretend food out of a big metal bowl. Her face was so adorable seeing the beaming smile as I joined in the game.


But even more cute was the cheeky laughter, even bigger smile and squeals of delight when Nana taught her to turn the big bowl upside down and use the spoon on the bottom of the bowl to make a really, really, REALLY LOUD banging noise!!!


Note to self... always have the camera handy!!


PS I will catch up the missing blog over the weekend as its a long weekend here in Auckland.

Tuesday, January 25, 2011

Card Day - Birthday Card

My friend Glenna celebrated her birthday last week and I wanted to do something a little different for her.


I know she loves green and she is a fantastic jewelery maker (she got me started into it) so these were the two things I wanted to incorporate into her card.


The background is some of the napkin patterned paper I demonstrated last week.
The beading is bugle beads threaded onto 26 gauge wire then shaped. The top ends have a double loop through which I threaded a coordinated brad. These are used to hold the beading in place. The bottom end is wrapped around the feathers to keep them in place and again is threaded through to the far side of the patterned paper to keep them attached as well.
I finished off with a couple of flowers and some bling.


This was the first time I have used feathers on any of my paper crafting, though I have used them hundreds of time in my former costume designing and making. I liked the effect and look forward to a lot more experimenting.

Monday, January 24, 2011

Technique Class - Fabric Paper

I love the look of fabric on a scrapbook page - probably because I am a sewer from way back, but I've always wondered about what was the best way to attach fabric to a page.
I could have tried sewing it on, but I know that not everyone is a sewer like me and I wanted an idea that the majority, rather than the minority could use.
Solution number 2 - double sided adhesive sheets.
Applying the double sided adhesive sheets to fabric is relatively easy, though you do need plenty of space especially if you are working with larger pieces of fabric. 
The method I used was much like how I used to cover school books with Plastic Contact Paper. 

  1. Cut double sided adhesive to size.
  2. Peel back a portion of the backing paper.
  3. Place adhesive (sticky side down) to the back of the fabric and smooth out the adhesive to ensure the adhesive and fabric are both smooth.
  4. Continue to gradually pull back the backing paper and adhering to fabric until all adhesive is attached.
I have some examples of three different versions of how I attached the adhesive to the fabric.
  • Fabric pieces
I found this fabric in a bundle with some other "Lightening McQueen/Cars" patterns at the Warehouse. My sister has bought some matching sheets & curtains for her third son's bedroom, so finding this was just what the doctor ordered for his "Welcome to the World" album I am creating to celebrate his birth.
I cut out some of the blocks so I could turn them into individual stickers. The blocks on the material face different directions (which annoys me) so I thought this would make the fabric easier to use and more versatile. Also this way I could get more out of the fabric... on scrapbook pages, cards, OTP projects as well.
Being the budget conscious scrapper I am, I then placed the cut pieces onto the backing paper to work out the most economical placement and cut the double sided adhesive to size.
Then I pealed back the backing paper and placed the individual patches into their respective places. The great thing was that this method meant I didn't have to worry about creases in the fabric as they were removed by the sticking process.
 
  • Fitting fabric to fit left over adhesive sheet
I worked out what part of the fabric I wanted to use. Cool fabric - also from the Warehouse.

Not sure if I will leave it whole or not or cut it into pieces so just left it whole for the time being. Otherwise just used the general process discussed above.
 Then I simply cut around the self adhesive paper.
  • Background Paper
The final piece I want to use as a background on a scrapbook page or two so wanted it to be as large as possible. I'm not sure yet, what shaping I will use so have left it whole until I make up my mind. These pictures show the process mentioned at the start of slowly peeling back the backing paper and sticking it down gradually.

 More cool fabric from the Warehouse.

Sunday, January 23, 2011

Best & Worst - Christmas Pressies 2010

To be honest there really was no "worst pressie" as such as I liked them all, so today's blog on the best & worst should really be titled "The Best Christmas Presents - 2010".


I loved Christmas 2009 because my girlfriends & I all bought each other scrapping related presents for a Christmas Present Challenge, though we had all year to purchase the goods within a framework of gifts and budgetary ideas. It was the best Christmas gift ever unwrapping the gifts everyone bought each other (and themselves) because we knew they were all scrapping related. Well it was the best Christmas gift ever, until Christmas 2010.
Last year I was fortunate enough to receive two special presents, not that the rest weren't lovely, but these two were pretty amazing for different reasons.
The first, was my Secret Santa gift through Crafting Passionz. The specifications were something scrapbooking related between $5 - $10. I love any gifts scrapbook related, because more often than not the gift-giver will usually buy something that I wouldn't buy myself, but that I end up using and absolutely loving. And even more so, if the gift-giver is a scrapper themselves.
I was lucky enough, blessed even, to be matched with Shar, the organiser of the swap. Shar, bless her heart, send the most AMAZING gift made up not only of some bought items but some TOTALLY COOL handmade items that she made especially for me. I was so blown away (and left feeling a bit guilty about what I had send my poor gift recipient).
 Just look at that stash. I don't have any Martha Stewart stamps, so this was an incredible bonus especially as I just love acrylic stamps. The Making Memories metal combo will look lovely on something altered or heritage. The scrolls I love and have some in my stash already, so they will soon be used in a project and I definitely don't have enough ribbon or storage containers for all my beads.
 I love this!! What more can I say - thank you Shar... all I need now is somewhere to display it... and I did get a very smart idea last night so watch this space.
 
This altered match box was too cute. And I loved the way that it matched my "P" but to see all the treasure inside it as well, just blew my mind away. Lots of charms and filigree beads to use in both my scrapbooking and jewelery making.


Earlier I mentioned two presents that were special this year. The second present wasn't a surprise for me... I dropped some less than subtle hints to my darling husband about what I wanted. I pointed out adverts on television, in brochures and mailers and even in shops when we saw them on display. I even pointed out the price when they were on special. 
What makes this gift so amazing was that it really was the first time my husband had actually bought me a gift that was scrapbooking related and that I really wanted. I love him to bits, but let me just say that his past history of gift-giving leaves a lot to be desired... however he made up for all of that and is back on par with my 2010 Christmas gift.
So what was it... I really wanted a Cuttlebug die cut machine from Provo Craft. Why I hear some of you say when I already have a Wizard (which I don't use); a Sizzix which I use quite a lot and a Klic-N-Kut which I love but am still learning how to use? I wanted one because I have a few larger and longer dies that just don't work that well in my Sizzix... you know the banner/border type Sizzlet dies that are so cool. And I have collection of Cuttlebug embossing dies that are a tight squeeze into the Sizzix.
Unfortunately dh was a little late in buying my present... the weekend before Christmas... so he ended up missing out on the special and had to pay full price but he still bought it... he's at a loss as to what the hell was in the box and how it works, but he knows it was something I really wanted and that was all that mattered. Thank you my darling, Pete.
And added bonus... four sets of dies included free with the machine... sweet!!!

Handmade

Sorry I'm a bit late posting tonight as I was crafting while doing an online class and taking notes. The class ran a bit longer than expected, but I'm here at last - not too late.


Flowers are really popular at the moment, especially hand-made ones whether made from cardstock, patterned paper, ribbon, fabric or anything else. I made some flowers last year for a swap - Felt Flowers and Paper Flowers - but wanted to explore some more and thought that it would be a perfect way to use some of the napkin decorated paper I made earlier in the week. I did warn you I hadn't finished with that creation, there will be more.


So here are today's handmade item - a double layer, shaped flower with a hint of colour from my home-made Glimmer Mist as well as some of the real stuff.


  1. I cut the individual petals from the napkin covered paper using my Cuttlebug - more on that tomorrow. 
  2. I shaped each of the petals using only finger pressure to give them a 3-dimensional look.
  3. Punched a small hole in the end of each petal using my Crop-O-Dile.
  4. Threaded a brad through the holes then spread the two layers of petals about evenly.
  5. Spritzed the flower with some of my home-made Glimmer Mist as well as some of the real thing for a hint of colour.
  6. Dried and reshaped the petals using my heat tool.
My only change would be to spritz the petals individually for a more even coverage then thread through the brad to hold it all together. And less hassle not spritzing the sexy brad if it's not in the way either.

Saturday, January 22, 2011

Photo Techniques - Rub-Ons

One of the simplest ways to do more with your photos when you are scrapbooking them, is to apply rub-ons directly onto your photo. Although it may seem a little daunting the first time you try... at least that is how I felt... you soon realise that it's not that big a deal and worst case scenario you can always re-print another copy of the photo. (Because we all know you never use your originals - right??!!)
Just apply the rub-ons to your photo as you would to cardstock, patterned paper, chipboard etc. You might just want to take the rubbing process a little more gently on your photo as you don't want the tool you are using to damage your photo.
Anyway here are some examples from some of my scrapping. Sorry the first layout was on black cardstock, so the black background I use pretty much blended into it, but you get the gist of it.
 
 
You can use the rub-ons as journalling. This rub-on is from AMM Expressions Rub-Ons "Love About You" and is available from my studio or online here.


Or you can use them as decorative elements either alone, or with the likes of Kindy Glitz, as above.
 
This ice-cream cone is from the Imaginisce Summer Lovin' set.

This is a pre-collaged patterned paper, complete with "Princess" title. All I did was add the photo, rub-ons and then the flowers with a brad and hey presto a great looking page. Simple but effective.


For a great of rub-ons to use on your photos and scrapbook pages, be sure to check what is in stock at the moment at http://www.scrapfx.co.nz/ and click on Shopping Cart.

Thursday, January 20, 2011

Layout (Sort Of)

Today is layout day, and I know it's not strictly a layout, but its my blog so I can bend my own rules to suit my own needs lol.


It's actually the cover of a 6" x 6" mini album I am keeping for the year to record all the books I have read.


I will be interested to see if anyone can guess how I made the cover... leave a comment and I will let you know if anyone guesses correctly.

Wednesday, January 19, 2011

Off-The-Page "2011 Diary"

I loved what I did last year so much that I just knew I had to personalise this year's diary as well. Look out next year!!!
This year I was a little wiser and took something with me that had the hole widths & sizes that my Bind-It-All cuts, so that I could look for a diary that already had the holes cut to the same size and dimension (a lesson from last year). I could only get a page per day diary so hence its a bit on the "chubby" side but that means more room for sketches & ideas.
I removed the flimsy plastic covers and replaced them with board book covers with I decorated with patterned paper, inside & out. I punched holes to align with the existing holes using my Bind-It-All.
I also add some month dividers like last year, but this time instead of adding pockets to them (which I hardy used last year) the dividers are actually doing TRIPLE duty.

  • First, as dividers so I know when each month begins & ends


  • Secondly, as a monthly planner for my blog, so I can keep on top of what blogs I'm doing when & what pre-planning & preparation I need to do before posting


  • And finally the back of each divider is printed with the list of important dates, such as birthdays, anniversaries etc, so I know when & who I need to create a card for. There is plenty of space for adding extra birthdays so if you want a card you had better make sure I know when your birthday is!!
The printing was a bit haphazard this year which disappointed me, but then my printer is playing up. I just hope I don't have to think about replacing it as up until now it was a terrific printer. Given that I am the only one who will be looking at it, I was happy to use the pages as they printed, they were still usable if the printing was a little skewed. Anyway, I did photograph some of the better pages, so you can see how it all looks.

Tuesday, January 18, 2011

Card Day

After yesterday's technique class on using paper napkins, it seemed fitting to make some cards & maybe a layout or two - still working on them - using the paper I created.
These will be blogged about over the coming weeks, but I just thought I would start with a quick card I created yesterday after the technique class.


  1. Fold white card into a card base. I used a pre-cut card base and folded along the pre-scored centre fold.
  2. Trim napkin covered card stock to size. I cut mine so that it was 1/4" smaller than the card base on all sides.
  3. Using a paper piercer & templates I pierced holes around all four sides of the card, then with two strands of embroidery thread, hand sewed a quick running stitch around the paper to create a border. I didn't want anything too heavy.
  4. Then I pierced the stems for the flowers having roughly worked out where I wanted to place the flowers.
  5. I sewed the stems using a back stitch so that the stems were complete, and used a full six threads of embroidery thread to give these a little more depth.
  6. Placed the flowers at the end of each stem. They are self-adhesive foam flowers I bought pre-made.
  7. Finally I added a rub-on sentiment inside the card and wrote it to the person I am sending it to.

Monday, January 17, 2011

Technique Class - Using Paper Napkins

When I first heard about people using paper napkins in their scrapbooking & crafting my first reaction was (quite bluntly) WTH?? Not only did I wonder how, I also wondered WHY (on earth) would you use those flimsy, boring squares of folded up paper I always took to picnics that generally got blown away before you could use them. And to be honest, I fobbed it all off as one of those "Not my cup of tea" trends and though no more of it.
Last year I signed up for a card swap on Crafting Passionz. Along with scraps of papers, ribbons, lace & brads, we had to send a paper napkin, so I had to go buy a pack, well two because I bought one and got one free (Gotta love a bargain).
So I figured seeing as I would be getting some in return and I now had some to spare, I had better find out how to use the things in my crafting. After some googling & You-Tubing, I gave it a go and well I loved the results.
Here is a link to a card I made earlier - Mel's Birthday Present.
So how do you use them? (And if anyone has any other ideas, please leave a comment with a link so I can go check them out myself).

  1. Napkins are usually double or triple layered so firstly separate the layers so you are left with the top "decorative" printed layer. The rest can be used for cleaning messes, drying stamps, paint brushes etc.
  2. Lightly spray your white paper / light-weight card stock with adhesive spray. I use Helmar Vellum Spray Adhesive as that is what I have on hand. Be use to spray in a well ventilated area or outside.
  3. Place your white paper on a flat surface, adhesive side up. Carefully place the napkin on top of the white paper. Pay particular attention to try to layer the napkin as crease-free as possible, unless this is the look you are going for. 
  4. Leave to dry - this should only take a few minutes, though ambient temperature & humidity may affect the drying time depending upon the adhesive used.
  5. Once dried, you can then treat your napkin as you would any other patterned paper. Cut to size, layer, decorate etc.
Variations:
  • Use coloured paper or light-weight cardstock to alter the finished colour
  • Scrunch the napkin (intentionally) for a more textured finish

Tuesday, January 11, 2011

Blogs

I haven't forgotten my promise or my plans for the blog... honest.


It's just I have some temping work on at the moment in the CBD and unfortunately this full-time working caper is not leaving me much time for crafting. Luckily the work for the end of the financial year is nearly completed, so hopefully I can reduce my hours and get back to crafting.


The good thing about all the travelling (it took me 45 minutes to get from the Downtown car park up the length of Hobson Street to the motorway on-ramp, and another 45 minutes to get home tonight) is that it gives me plenty of time to think about and plan some upcoming blogs and sketch some layouts & cards.


I have some great ideas about techniques... and you should see the cool cards I've designed... and all the layouts I have in mind... and all the really cool off the page projects... I am just going to be so busy creating all these great things to share with you.


Watch this space I have a busy weekend planned creating the samples and designs for the first few blogs...


Oh and if you are interested in joining in a circle journal send me an email to paula@scrapfx.co.nz and I can send you some information. Sign-ups are by 22nd January and numbers are strictly limited. First in, first served.

Monday, January 3, 2011

2010 - Review

2010 was an interesting year... bit of a roller coaster with a lot of ups & downs both crafting-wise and personally. It seems only fitting to acknowledge some of these as a final goodbye to last year.

  • Losing my scrapping mojo - though there were some relapses of good scrapping I was really pleased with, most memorable for me was the little cases I made for the stick pin swap on Crafting Passionz.
  • My father's diagnosis with bowel cancer - though it did mean a trip down to Christchurch for me to spend a month looking after my parents post Dad's surgery and most importantly his chemotherapy has gone well since then.
  • Regaining most of the weight I had lost.
  • Breakdown of some close relationships and the loss of some friends but then I have also reconnected with some other people and their friendship and support is more important and fulfilling than what was lost.
  • Tragedies - Pike River Mine - loss of 29 lives in Greymouth and the ongoing earthquakes, though luckily no loss of life in Christchurch - my home town and where my parents still live.
  • My step children's grandfather's diagnosis with a brain tumour and the stresses of dealing with things on his behalf, never-ending trips to hospital for treatments, having to put him into a rest home, watching the changes in him and feeling so utterly helpless and unable to do anything to help.
  • The loss of a dear friend and mentor over New Year's. He suffered a brain aneurysm followed by a massive stroke a couple of days later. His passing has left a huge hole for so many people.
  • Finally getting some work, albeit only 5 weeks temping work, though it still feels like a good omen of things to come in 2011.
  • Receiving in the mail along with a Christmas Card  and family newsletter, the cutest and coolest and most totally unexpected mini personalised calendar from my wonderfully talented friend Gypsy - thank you so much for making my day and my year.
  • The birth of my third nephew, Troy and being able to cuddle him both when I was visiting in Christchurch when he was only three weeks old and again in the middle of December when my sister, her hubbie and  Troy visited Auckland.
  • Buying my darling hubbie's dream car "Sally" a gorgeous fire engine red Mitsubishi GTO, which I love being able to drive... when he lets me have the keys LOL.
  • Making new friends, who get me and who encourage and support me to step outside my comfort zone and try new things and not be afraid to launch an attack with everything in my arsenal.
  • Making my charms for a Kiwiana charm swap with my scrapping girlfriends, especially the marmite jars which I just love.
  • Receiving the most incredible "Secret Santa" swap gift from Shar at Crafting Passionz. I will post a picture in the next day or two so you can all see how incredibly lucky I was.
  • Nana and Sonia-Marie time... the two of us lying on my bed looking over the side to see what we can discover - you have to love the way kids see the world; Sonia patting the step which means she wants you to sit down beside her on the stairs for a bit; the way she grabs one finger and pulls you behind her when she wants to go for a walk (usually outside regardless of the weather) and lots and lots of cuddles and kisses and snuggles - though I always want more.
  • Best of all has been every time my darling husband has told me and shown me how much he loves me.
I'm looking forward to 2011, to the opportunities it will provide, the challenges and the possibilities and most importantly to getting my scrapping mojo back.

Sunday, January 2, 2011

2011 - Changes to the Blog

The end of 2010 has seen a huge turn-around for me personally. I finally secured some temping work, after 18 months of being unemployed, so all my plans for my second year of a Christmas Challenge went out the window. (I interviewed one day and started work in the CBD the next day having to contend not only with suddenly working a full day, but also having to travel up to an hour or so each way as well.) 
All the travelling has given me time to think about where I wanted my crafting and my blog to go. 

  • Did I still want to keep crafting? - an emphatic YES
  • Did I still want to keep blogging? - a slightly less enthusiastic yes, given I feel like I am doing this purely for myself. The lack of comments and feedback is discouraging as it seems people will only comment if there is something in it for them... like a freebie or give away.
  • Do I want to continue crafting and blogging in the same manner and format that I have done in the past and in particular during this past 18 months? - an emphatic NO
I'm still thinking about the changes I want to make to how & why & where & what I craft... so more on that later, but I have at least come up with a plan for my blogging. It's going to be pretty intense - daily blogging (no pressure Paula) but hopefully I can organise and prepare in advance enough so that I can reduce as much unnecessary pressure as possible.

So what is the mysterious big plan for 2011...

MONDAY's blog's a TECHNIQUE CLASS;
TUESDAY's CARDS are really fast;
WEDNESDAY'S blogs are OFF THE PAGE;
THURSDAY's LAYOUTS are my fav's;
FRIDAY's got PHOTOS all galore;
SATURDAY is things NOT FROM a STORE;
And SUNDAY's blog is all the rest,
From the very WORST to the very BEST.

There will be some one-off items which are blogged from start to finish in a 5 minute read as well as some on-going projects which may take the whole year (or more) to complete so you will get regular updates on the progress I've made. As well as paper based crafts, I may also try to sneak in some other crafts to show off my versatility.

And maybe, just maybe (no promises on this one)... there could be a freebie or two along the way.