
I've signed up to a swap through Crafting Passionz forum for a corset tag swap. We were given a link to Gracie Brown's blog "Sew Gracious". I loved the idea of a corset tag pocket rather than just the tag shaped liked a corset, so I used this as my own inspiration. Gracie includes a template on her blog, but I used my own template I've had for years.
For this swap I am making a corset shaped pocket with a mini tag inside. The corset front and back are both lined to make it easier to get the tag in and out as well as resolving some potential problems that might come out of my using a non-stretch fabric on the outside of the tags and it just looks smarter.
Ingredients:
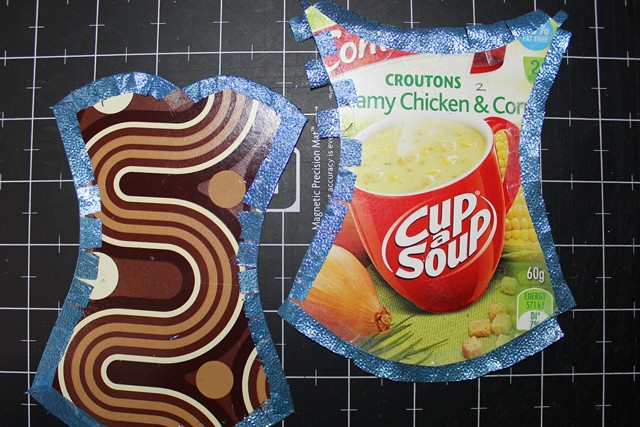
Cardboard - I used recycled packaging
Cardstock - black for backing
Fabric - I used leftover Japanese Tissue Lame from the flowers I made for another swap
Lace
Satin and Shear Ribbons
Bling
Double sided tape (lots of it)
Tacky Glue
Methodology:
As usual I am making a number of these Corset Tag Pockets, so I am doing things production line style. Each step is repeated for as many pockets as I am completing - in this case five. This also explains why the images show different colours :-)
- Trace around templates or draw corset front and back shapes onto recycled cardboard as well as cardstock to be used as backing. If you are making a simple tag then you only need the front, but if you are making pockets like I am, then you need both front and back shapes.

- As I was making five Corsets, I matched up pairs of fronts and backs to get the best fit, then made any slight adjustments as needed so each pair matched perfectly for both the cardboard and the cardstock. At this stage I labelled each pair so I knew what went together in case they got separated and also so I could match the correct facing cardstock correctly as well.
- Carefully adhere double sided tape around the edges as follows:
- Both sides of the cardboard corset front and back - to hold the fabric firmly stretched across the "good" side of the corset as well as the wrap around of the edges of the fabric.
- The rough side of the cardstock corset front and back
- I used double sided tape for this step as my fabric is quite thin and liquid glue would have spread through the weave of the fabric, ruining the metallic look of it. It did take some time going around all the edges as listed, but once done the next few steps were relatively quick.
- Remove the backing on the double sided tape on the front of each corset shape. Carefully place this side down on your fabric making sure that the fabric is flat to avoid puckering or bunching up. Press the fabric down to firmly adhere in place.

- Cut the fabric around the corset shape leaving an edge of about 1/4" (6mm) to turn over to the other side of the shape.

- Evenly space snips around the turnover edge of fabric being sure not to cut into the cardboard. Remove each corner of the fabric so that you don't end up with too much bulk to fold over. Remove the backing for the double sided tape on the other side of the cardboard shape and press the slits of fabric onto the exposed double sided tape to adhere.

The corners have been remove and the edges around both shapes just snipped ready to fold over.
I've started to fold over the snipped edges. You can see on the back in particular the snips as I've folded over every second segment to show what I mean.

On any convex curves, the snips may end up over lapping as shown above.

On any concave curves, the snips will end up having gaps between them, as shown above.

All the snips have been folded over an adhered in place.

And the finished fronts and backs after the fabric has been adhered to one side.
- Adhere the backing cardstock over the back side to hide the turnover edge of fabric (so no one can see the secret of how you got the fabric to fit so well). You can just see a little of the blue fabric poking out in the bottom left hand corner.

- Repeat these steps so you have coordinated front and back to your corset. (I'm making five in total for the swap. I only have four colours of the fabric, so hence two golds).
- To make the pocket for the tag, adhere the sides and base of the corset front and back to each other, leaving the top open so you can slide the tag inside.
- Decorate your corset pocket as desired. I adhered a row of gathered lace around the bottom of the pocket (front and back). Then I added an over sized bow to the back just above the row of lace and some rhinestones accents around the upper edge.

The lace detail around the lower edge (front and back). I originally used double sided tape, but I've since had to use some tacky glue as the tape didn't hold as firmly as I would have hoped.

Over sized satin ribbon bow. I tied the bow then fitted the size to the width of the corset. It was adhered in place with tacky glue on the knot part as well as each loop of the bow. I then trimmed the end of the bow with a "V" to stop them fraying - and it looks cuter as well.

The rhinestone accents on the front and back.
- To finish these off, I made a simple tag with some left over cardstock. I adhered a sheer ribbon loop underneath a small "Moulin Rouge" vintage poster image I downloaded from the internet. I then tucked the tag in the pocket.

No comments:
Post a Comment